1.Vscode插件制作
当然也可以看非官方的注解,其实也挺全的,就是翻译过来的版本
首先跟从官方文档,安装Node.js和Git,然后安装Yeoman和VS Code Extension Generator
npm install -g yo generator-code这个脚手架会生成一个可以立马开发的项目。运行生成器,然后填好下列字段:
yo code

# ? What type of extension do you want to create? New Extension (TypeScript)
# ? What's the name of your extension? HelloWorld
### Press <Enter> to choose default for all options below ###

# ? What's the identifier of your extension? helloworld
# ? What's the description of your extension? LEAVE BLANK
# ? Enable stricter TypeScript checking in 'tsconfig.json'? Yes
# ? Setup linting using 'tslint'? Yes
# ? Initialize a git repository? Yes
# ? Which package manager to use? npm

code ./helloworld
完成后进入 VS Code,按下F5,你会立即看到一个插件发开主机窗口,其中就运行着插件。
在命令面板(Ctrl+Shift+P)中输入Hello World命令。
注意⚠️,一来的vscode引擎要和当前你使用的vscode相互匹配~


启动插件
完成后进入 VS Code,按下F5,你会立即看到一个插件发开主机窗口,其中就运行着插件。
在命令面板(Ctrl+Shift+P)中输入Hello World命令。
目录结构+概念介绍
Hello World插件包含了3个部分:
注册
onCommand激活事件,也就是Activation Events,onCommand:extension.helloWorld,所以用户可以在输入Hello World命令后激活插件。{ "activationEvents": [ "onCommand:vscode-persona5.start", "*" ] }使用
contributes.commands发布内容配置,也就是Contribution Points,绑定一个命令IDextension.helloWorld,然后Hello World命令就可以在命令面板中使用了。使用
Contribution Points,也就是VS Code API,将一个函数绑定到你注册的命令IDextension.helloWorld上。
理解下面三个关键概念你才能作出一个基本的插件:
- Activation Events:插件激活的时机。
- Contribution Points: VS Code扩展了
package.json插件清单的字段以便于开发插件。 - VS Code API: 你的插件代码中需要调用的一系列JavaScript API。
.
├── .vscode
│   ├── launch.json     // 插件加载和调试的配置
│   └── tasks.json      // 配置TypeScript编译任务
├── .gitignore          // 忽略构建输出和node_modules文件
├── README.md           // 一个友好的插件文档
├── src
│   └── extension.ts    // 插件源代码
├── package.json        // 插件配置清单
├── tsconfig.json       // TypeScript配置
认识2个生命周期函数activate 和 deactivate, activate 在您注册的激活事件发生时执行。 deactivate 让您有机会在扩展停用之前进行清理
//激活执行
export function activate(context: vscode.ExtensionContext) {
    let disposable = vscode.commands.registerCommand('helloworld.helloWorld', () => {
        vscode.window.showInformationMessage('Hello Persona!');
        vscode.window.showErrorMessage('Error!');
    });

    context.subscriptions.push(disposable);
}

//销毁时清理
export function deactivate() {}
注册一个命令
vscode.commands.registerCommand会把命令ID绑定到你插件的函数上:
import * as vscode from 'vscode';

export function activate(context: vscode.ExtensionContext) {
    const command = 'myExtension.sayHello';

    const commandHandler = (name?: string = 'world') => {
        console.log(`Hello ${name}!!!`);
    };

    context.subscriptions.push(vscode.commands.registerCommand(command, commandHandler));
}复制到剪贴板复制错误已复制只要myExtension.sayHello命令执行,就会调用对应的处理函数,你也可以通过executeCommand程序性调用它,或者从VS Code UI中,抑或快捷键的方式调用。
配置面向用户的命令
vscode commond
如果想让用户从命令面板中找到你的命令,你还需要在package.json中配置对应的命令配置项(contribution):
{
    "contributes": {
        "commands": [
            {
                "command": "myExtension.sayHello",
                "title": "Say Hello"
            }
        ]
    }
}
此时在调试程序中commond+shift+p,输入 title 即可执行命令
直接执行命令
vscode.commands.executeCommandAPI可以程序性调用一个命令,你可以通过它将VS Code的内置函数构建在你的插件中,比如VS Code内置的Git和Markdown插件中的东西。
我们看个例子🌰:editor.action.addCommentLine命令可以将当前选中行变成注释(你可以偷偷把这个功能地集成到你自己的插件中哦):
import * as vscode from 'vscode';

function commentLine() {
    vscode.commands.executeCommand('editor.action.addCommentLine');
}
2. Activation Events 激活事件
激活事件是您在 package.json 扩展清单 activationEvents 字段中进行的一组 JSON 声明。当激活事件发生时,扩展将被激活。具体激活事件列表
onCommand
This activation event is emitted and interested extensions will be activated whenever a command is being invoked:
每当调用命令时,都会发出此激活事件,并且将激活感兴趣的扩展:
...
"activationEvents": [
    "onCommand:extension.sayHello"
]
...Note: Beginning with VS Code 1.74.0, commands contributed by your extension do not require a corresponding
onCommandactivation event declaration for your extension to be activated.
注意:从 VS Code 1.74.0 开始,扩展提供的命令不需要相应的onCommand激活事件声明即可激活扩展。
3.常用API+常量
api分类概览,主要分为
- 常用命令:一些注册、通知、监听输入的通用api;
- 主题:主题颜色控制;
- 声明性语言:代码控制(自动缩进);
- 编程语言功能(lint、悬浮提示)
- 拓展(右侧出现一个交互的treeview、或者一个webview)
命令是VS Code 运作的核心。你可以打开命令面板执行,用快捷键执行,还可以在菜单中鼠标右键执行。
一个插件应该:
- 使用
vscode.commands注册和执行命令 - 配置
contributes.commands,确保命令面板中可以顺利执行你注册的命令
获取工作区的配置项
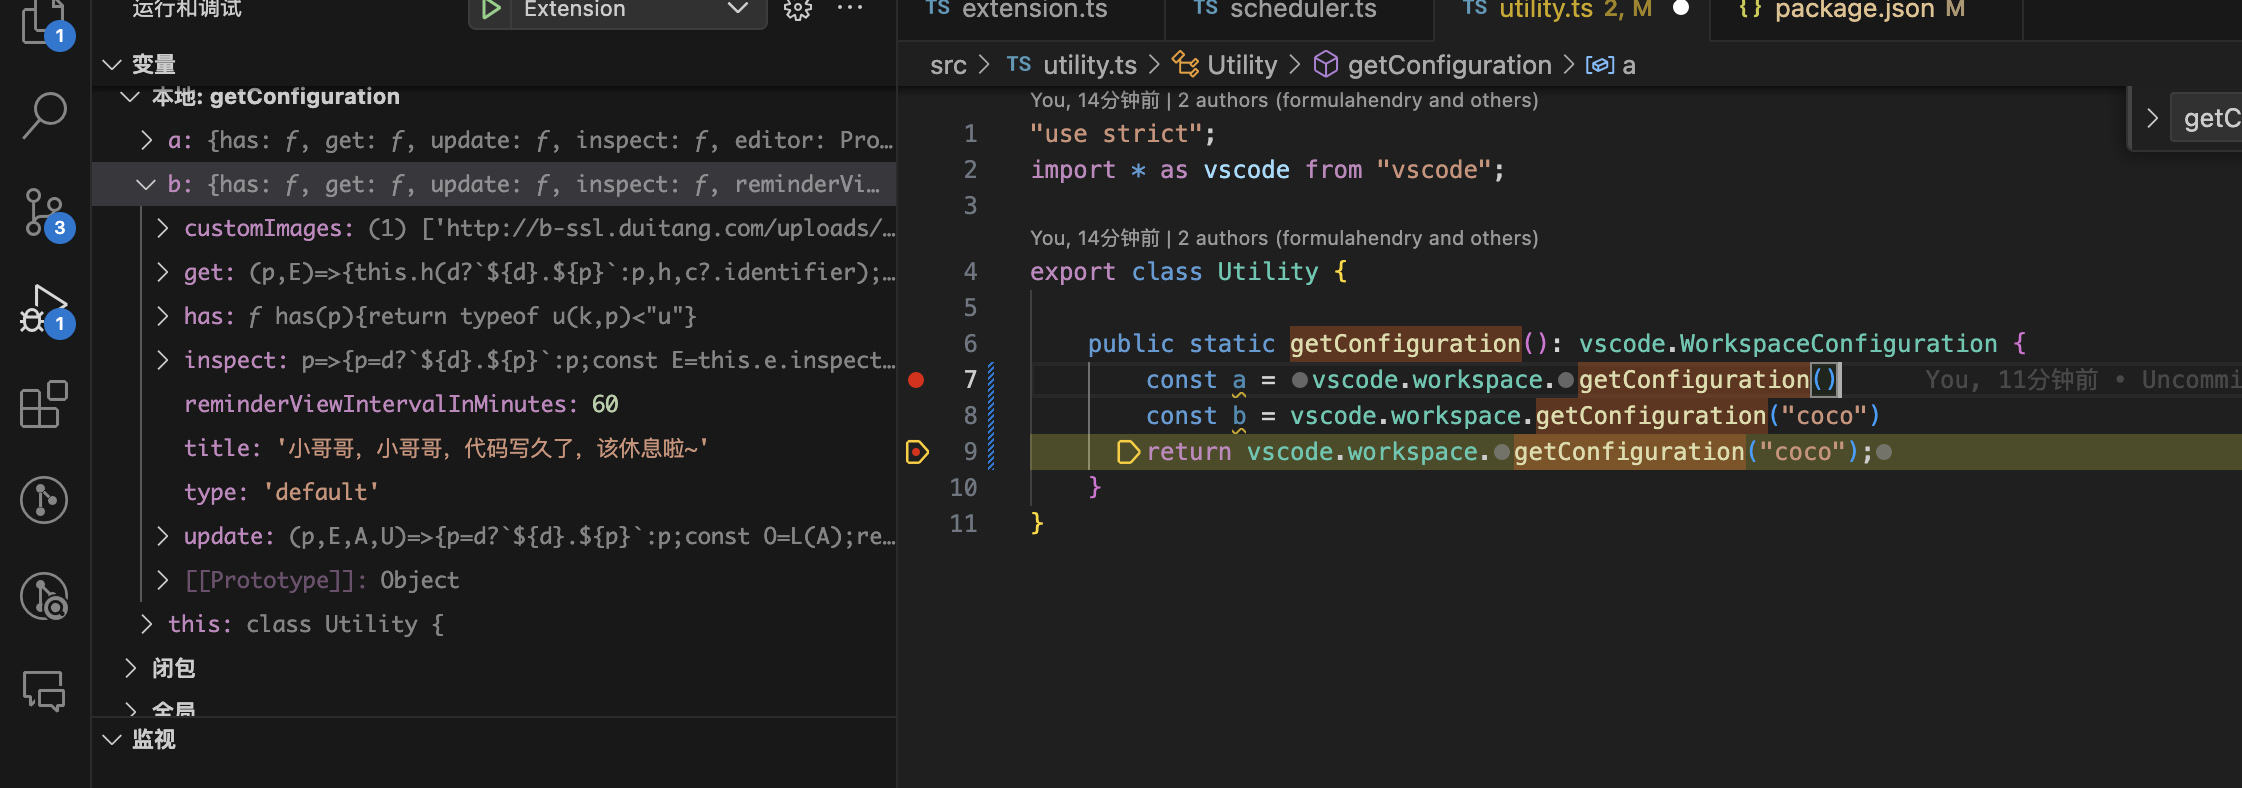
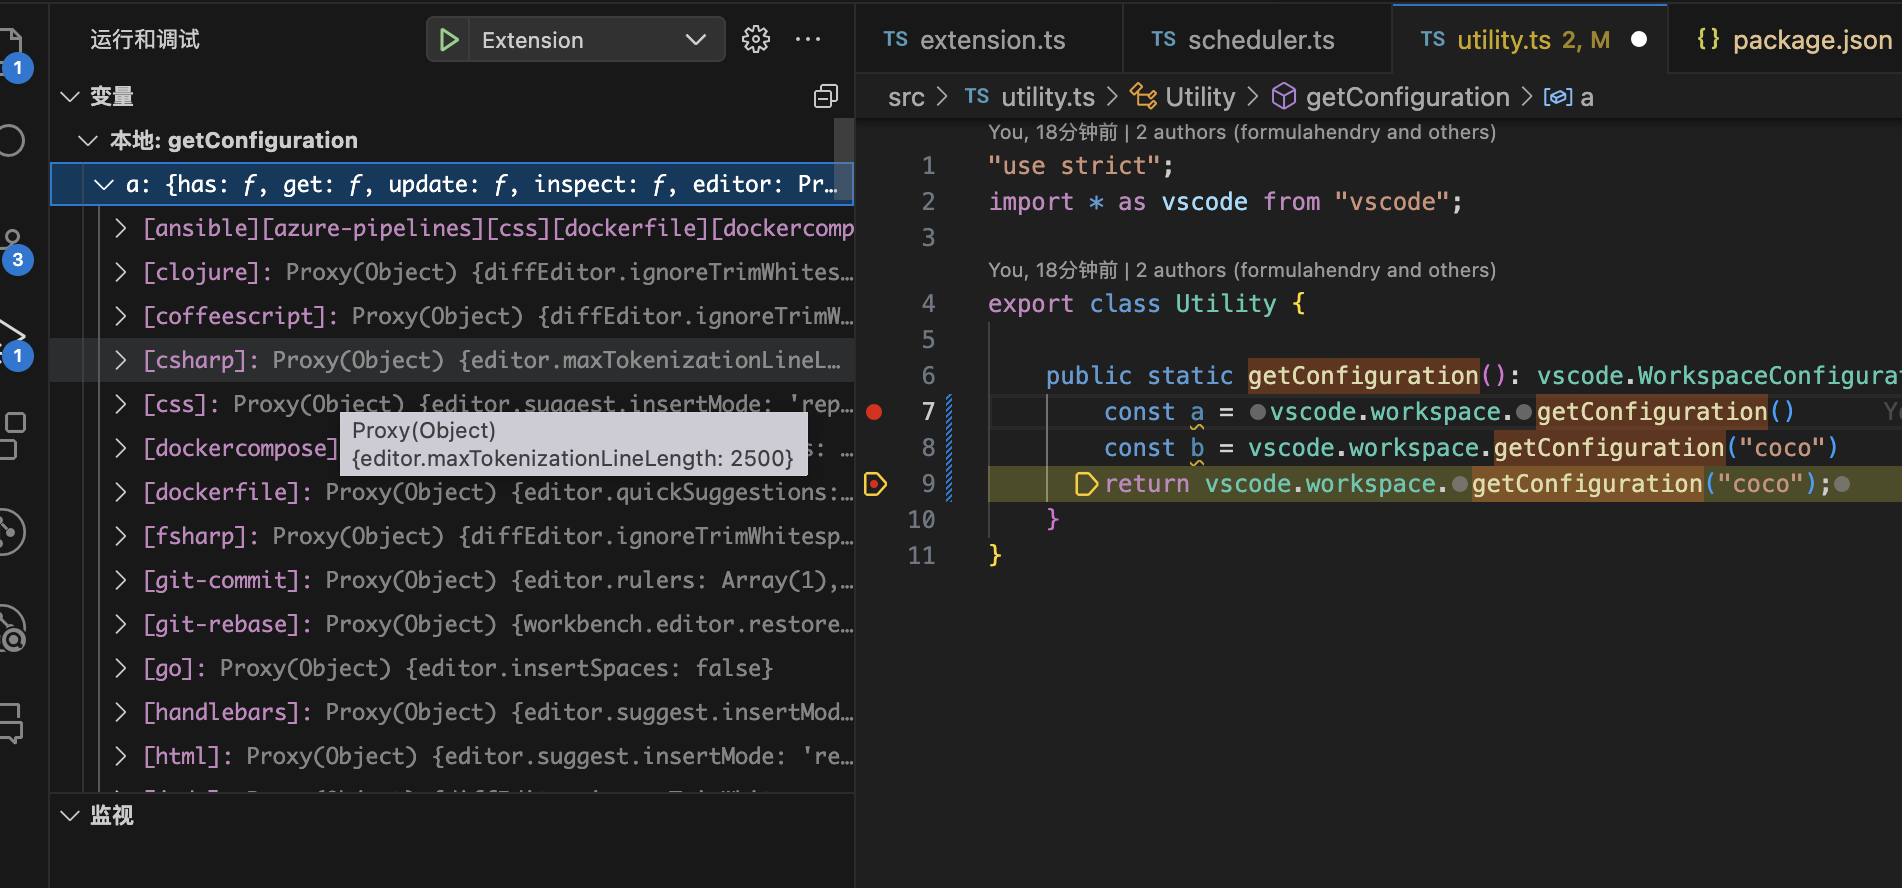
插件需要在contributes.configuration发布内容配置点中填写有关的配置,你可以workspace.getConfigurationAPI中阅读有关内容。
"use strict";
import * as vscode from "vscode";

export class Utility {

    public static getConfiguration(): vscode.WorkspaceConfiguration {
        return vscode.workspace.getConfiguration("配置项的别名");
    }
}
解析文件路径+修改文件路径
let files: vscode.Uri[] = [];
// 读取文件目录列表 readdirSync
const result = fs.readdirSync(dirPath);
result.forEach(function (item, index) {
  const stat = fs.lstatSync(path.join(dirPath, item));
  if (stat.isFile()) {
    files.push(vscode.Uri.file(path.join(dirPath, item)).with({ scheme: 'vscode-resource' }));
  }
});
return files;
通过 vscode.Uri.file 得到文件路径下的解析结果
vscode.Uri.file
从文件系统路径创建 URI。该计划将是 file .
Uri.parse 和 Uri.file 之间的区别在于,后者将参数视为 path,而不是字符串化 uri。例如,与路径不同, Uri.file(path) 因为路径 Uri.parse('file://' + path) 可能包含被解释的字符(# 和 ?)。请参阅以下示例:
const good = URI.file('/coding/c#/project1');
good.scheme === 'file';
good.path === '/coding/c#/project1';
good.fragment === '';

const bad = URI.parse('file://' + '/coding/c#/project1');
bad.scheme === 'file';
bad.path === '/coding/c'; // path is now broken
bad.fragment === '/project1';
vscode.Uri.with
通过修改生成新的uri
let file = Uri.parse('before:some/file/path');
//修改协议
let other = file.with({ scheme: 'after' });
assert.ok(other.toString() === 'after:some/file/path');4.ExtensionContext
context: vscode.ExtensionContext
可从function activate(context: vscode.ExtensionContext){}传入
插件路径
import * as path from 'path';

const myImagePath = path.join(this.context.extensionPath, 'images/coco');
5.webview
官方一些简单的案例
创建webview
createWebviewPanel
创建并显示新的 Web 视图面板api: createWebviewPanel (viewType: string, title: string, showOptions: ViewColumn | {preserveFocus: boolean, viewColumn: ViewColumn}, options?: WebviewPanelOptions & WebviewOptions): WebviewPanel
createWebviewPanel(viewType: string, title: string, showOptions: ViewColumn |{preserveFocus: boolean, viewColumn: ViewColumn}, options?: WebviewPanelOptions & WebviewOptions) WebviewPanel
| Parameter 参数 | Description 描述 |
|---|---|
| viewType: string | 标识 Web 视图面板的类型。 |
| title: string | 面板的标题。 |
| showOptions: ViewColumn | {preserveFocus: boolean, viewColumn: ViewColumn} | 在编辑器中显示 Web 视图的位置。如果设置了 preserveFocus,则新的 Web 视图将不会聚焦。 |
| options?: WebviewPanelOptions & WebviewOptions | 新面板的设置。 |
| Returns | Description |
| WebviewPanel | 新的 Web 视图面板。 |
一些api
reveal
显示 / 重新显示 webview视图:reveal(viewColumn?: ViewColumn, preserveFocus?: boolean): void
| Parameter | Description |
|---|---|
| viewColumn?: ViewColumn | 视图列以显示面板。如果未定义,则显示在当前 viewColumn 中。 |
| preserveFocus?: boolean | 当 时 true ,webview 将不聚焦。 |
dispose
扩展还可以通过调用 dispose() 它们以编程方式关闭 Web 视图
const timeout = setTimeout(() => panel.dispose(), 5000);onDidDispose
当 Web 视图被销毁时,将触发该 onDidDispose 事件。我们可以使用此事件来取消进一步的更新并清理 webview 的资源
panel.onDidDispose(
  () => {
    // When the panel is closed, cancel any future updates to the webview content
    clearInterval(interval);
  },
  null,
  context.subscriptions
);
使用本地资源
const panel = vscode.window.createWebviewPanel(
'catCoding',
'Cat Coding',
vscode.ViewColumn.One,
{}
);
// Get path to resource on disk
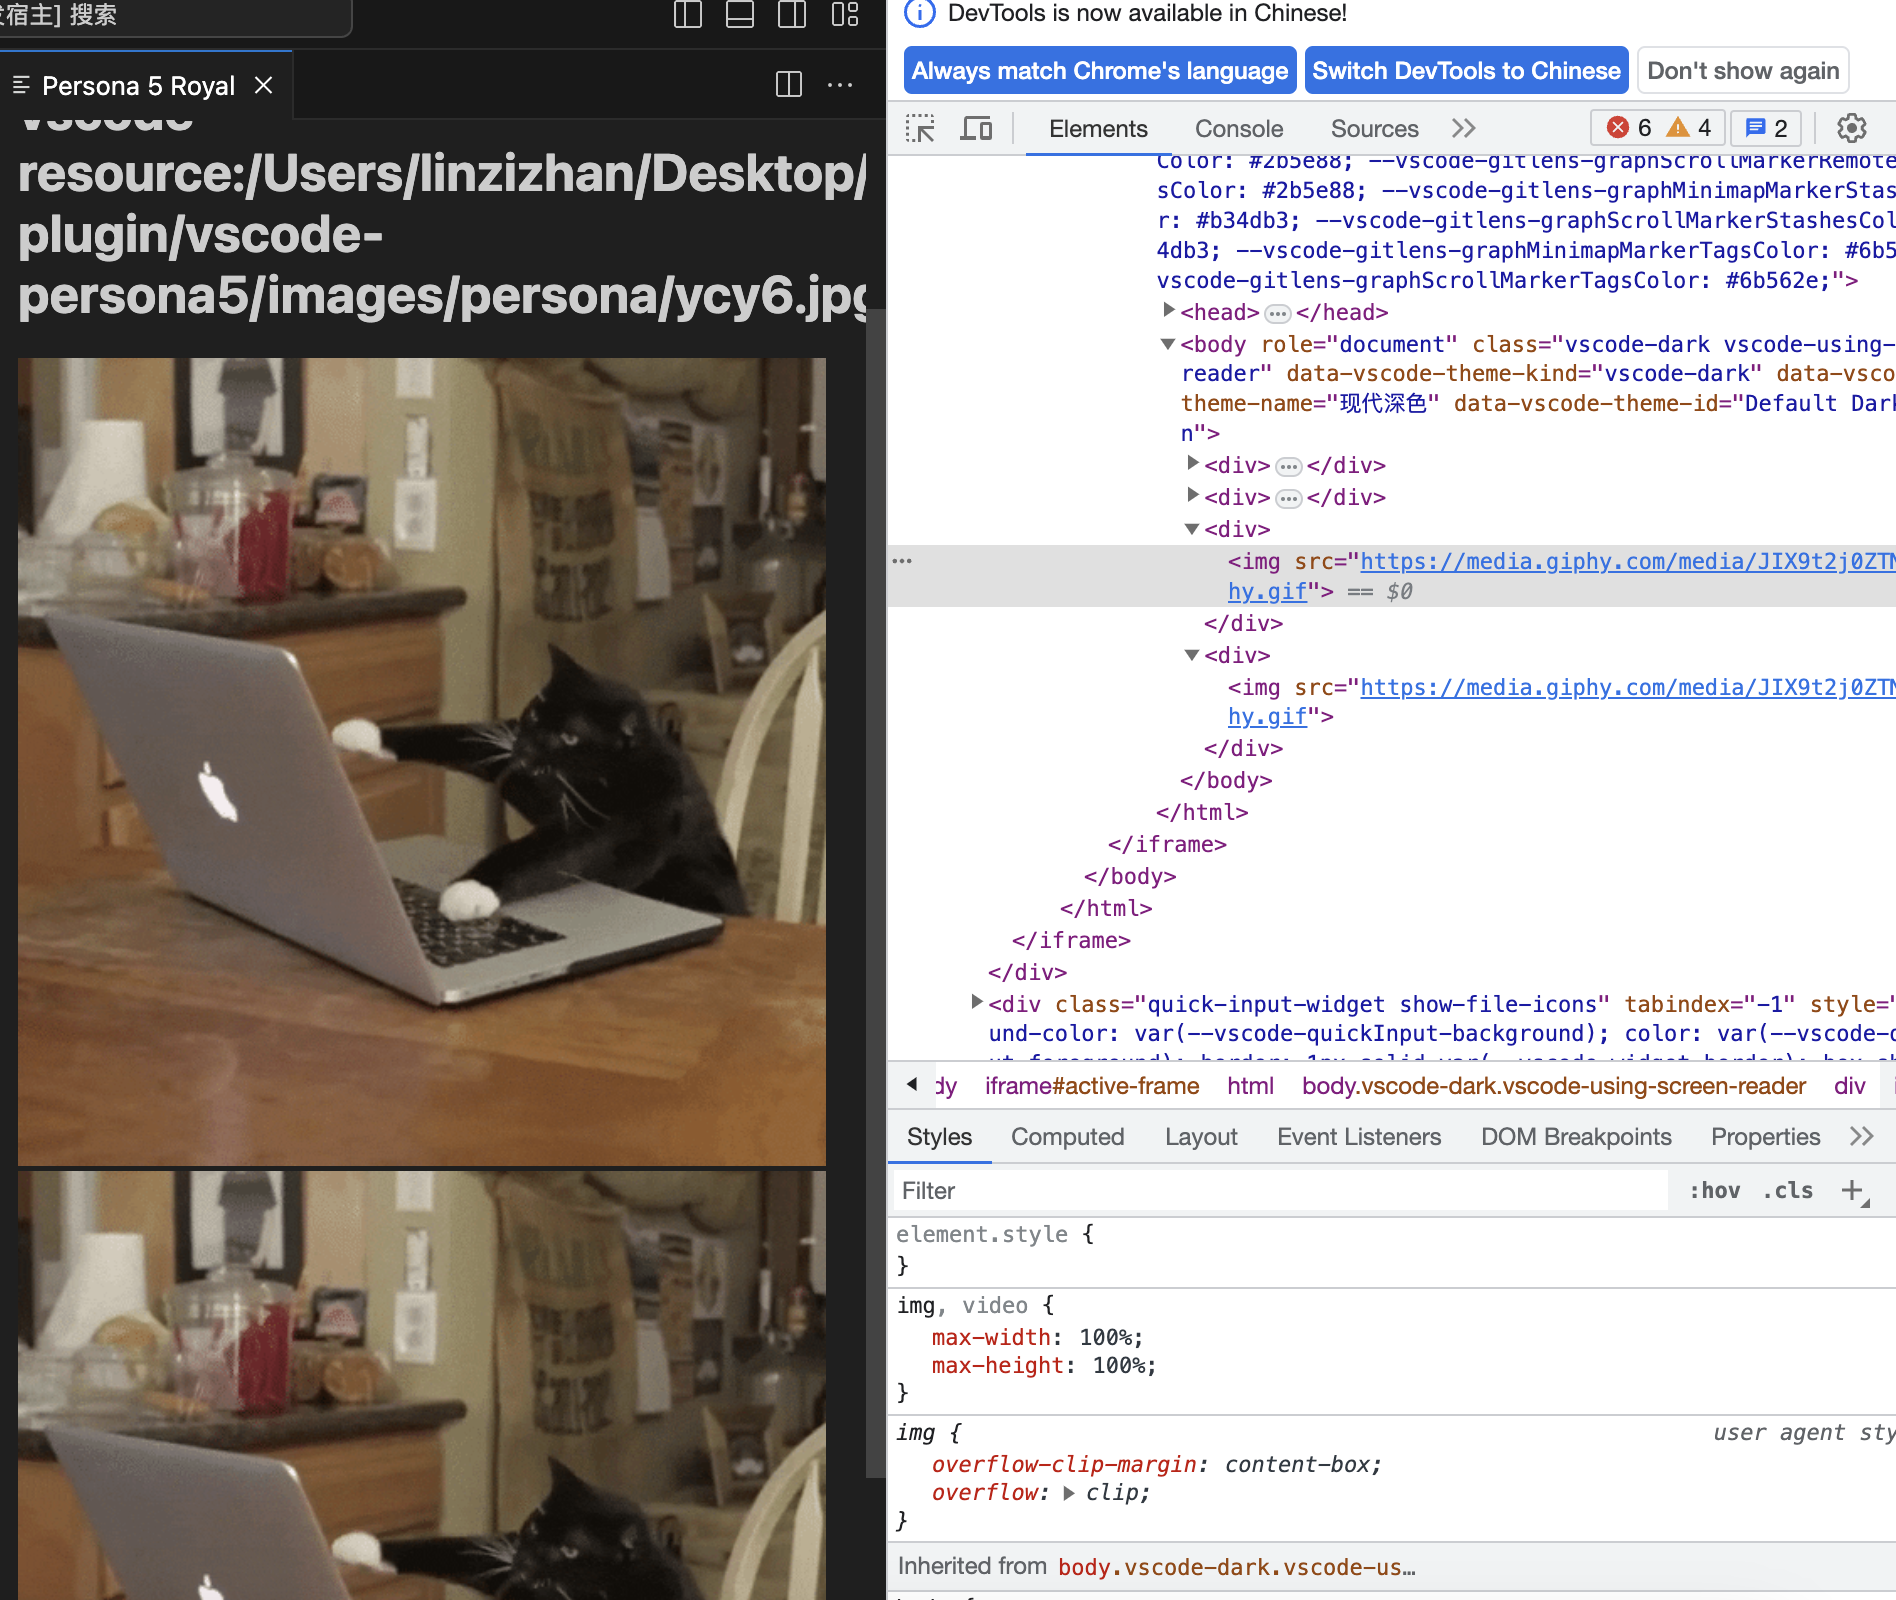
const onDiskPath = vscode.Uri.joinPath(context.extensionUri, 'media', 'cat.gif');
// And get the special URI to use with the webview
const catGifSrc = panel.webview.asWebviewUri(onDiskPath);
panel.webview.html = getWebviewContent(catGifSrc);//如果我们调试此代码,我们会看到 的实际 catGifSrc 值如下所示:
vscode-resource:/Users/toonces/projects/vscode-cat-coding/media/cat.gifVS Code 理解这个特殊的 URI,并将使用它从磁盘加载我们的 gif
但是默认情况下,Web 视图只能访问以下位置中的资源:
- Within your extension’s install directory.
在扩展的安装目录中。 - Within the user’s currently active workspace.
在用户当前处于活动状态的工作区中。
脚本
Web 视图就像 iframe 一样,这意味着它们也可以运行脚本。默认情况下,JavaScript 在 Web 视图中处于禁用状态,但可以通过传入该 enableScripts: true 选项轻松重新启用。
import * as path from 'path';
import * as vscode from 'vscode';

export function activate(context: vscode.ExtensionContext) {
  context.subscriptions.push(
    vscode.commands.registerCommand('catCoding.start', () => {
      const panel = vscode.window.createWebviewPanel(
        'catCoding',
        'Cat Coding',
        vscode.ViewColumn.One,
        {
          // Enable scripts in the webview
          enableScripts: true
        }
      );

      panel.webview.html = getWebviewContent();
    })
  );
}

function getWebviewContent() {
  return `<!DOCTYPE html>
<html lang="en">
<head>
    <meta charset="UTF-8">
    <meta name="viewport" content="width=device-width, initial-scale=1.0">
    <title>Cat Coding</title>
</head>
<body>
    <img src="https://media.giphy.com/media/JIX9t2j0ZTN9S/giphy.gif" width="300" />
    <h1 id="lines-of-code-counter">0</h1>

    <script>
        const counter = document.getElementById('lines-of-code-counter');

        let count = 0;
        setInterval(() => {
            counter.textContent = count++;
        }, 100);
    </script>
</body>
</html>`;
}
视频播放
和本地资源一样,直接引用对应的url链接即可,注意autoplay属性束腰muted才能生效
其他
在命令面板中输入Developer: Toggle Developer Tools能帮助你调试webview。运行命令之后会为当前可见的webview加载一个devtool
6.一些简单的插件示例
7.用户配置项
在package.json中配置,在代码中可以通过上方的获取工作区配置项来获取
{
  "contributes": {
  "configuration": {
    "type": "object",
    "title": "coco本co",
    "properties": {
      "other": {
        "type": "number",
        "default": 60,
        "description": "展示提醒页面的时间间隔(分钟)"
      },
      "coco.reminderViewIntervalInMinutes": {
        "type": "number",
        "default": 60,
        "description": "展示提醒页面的时间间隔(分钟)"
      },
      "coco.title": {
        "type": "string",
        "default": "代码写久了,该休息啦~",
        "description": "页面内展示文字"
      },
      "coco.type": {
        "type": "string",
        "default": "default",
        "description": "类型:default:默认图;url:网络图"
      },
      "coco.customImages": {
        "type": "array",
        "default": [
          "http://b-ssl.duitang.com/uploads/item/201806/04/20180604090459_gqqjo.jpg"
        ],
        "description": "用户设置图片地址"
      }
    }
  }
},
}
此时可以看到在获取工作区的配置项时,通过 vscode.workspace.getConfiguration("coco"); 可以获取coco作用域下的用户配置,
如果直接获取全局配置的话会夹杂很多其他自带东西,但是也能拿到数据,所以看个人习惯吧(官网我看案例都是用别名的)
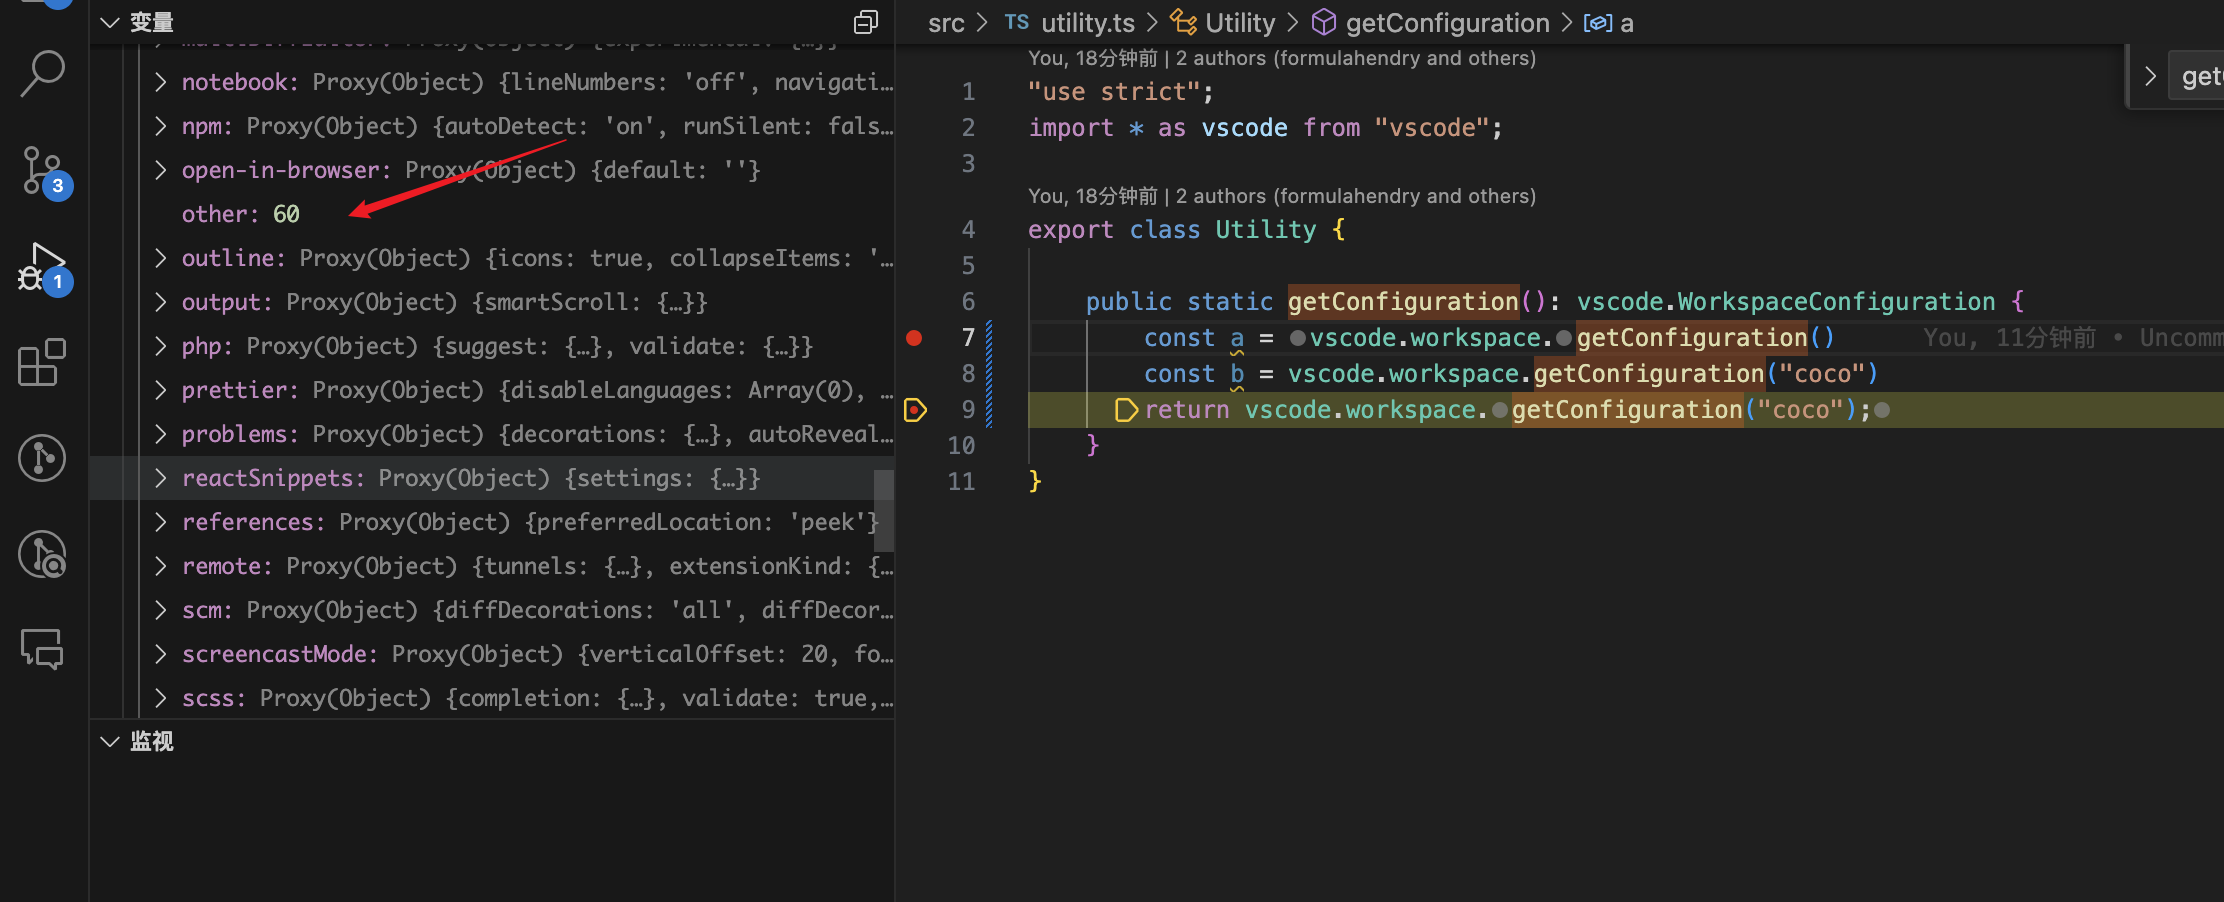
然后再链式调用获取我们的所需配置项数值
//方式1
const b = vscode.workspace.getConfiguration("ycy").reminderViewIntervalInMinutes;
//方式2
const b = vscode.workspace.getConfiguration("ycy").get<number>('reminderViewIntervalInMinutes', 60));
8.发布
- 安装vsce
npm install -g @vscode/vsce[注册Azure账户]( create your own organization)
跳转到 Visual Studio Marketplace 发布者管理页:Visual Studio Marketplace publisher management page.
To create a publisher:
要创建发布者,请执行以下操作:Go to the Visual Studio Marketplace publisher management page.
转到 Visual Studio Marketplace 发布者管理页。Log in with the same Microsoft account you used to create the Personal Access Token in the previous section.
使用您在上一节中创建个人访问令牌时所用的同一 Microsoft 帐户登录。Click Create publisher in the pane on the left.
单击左侧窗格中的创建发布者。In the new page, specify the mandatory parameters for a new publisher - identifier and name (ID and Name fields respectively):
在新页面中,指定新发布商的必需参数 - 标识符和名称(分别为 ID 和 Name 字段):- ID: the unique identifier for your publisher in Marketplace that will be used in your extension URLs. ID cannot be changed once created.
ID:发布商在 Marketplace 中的唯一标识符,将在扩展 URL 中使用。ID 一经创建,便无法更改。 - Name: the unique name of your publisher that will be displayed in Marketplace with your extensions. This can be your company or brand name.
名称:发布者的唯一名称,将与扩展一起显示在 Marketplace 中。这可以是您的公司或品牌名称。
Below is an example of publisher identifier and name for the Docker extension:
下面是 Docker 扩展的发布者标识符和名称示例: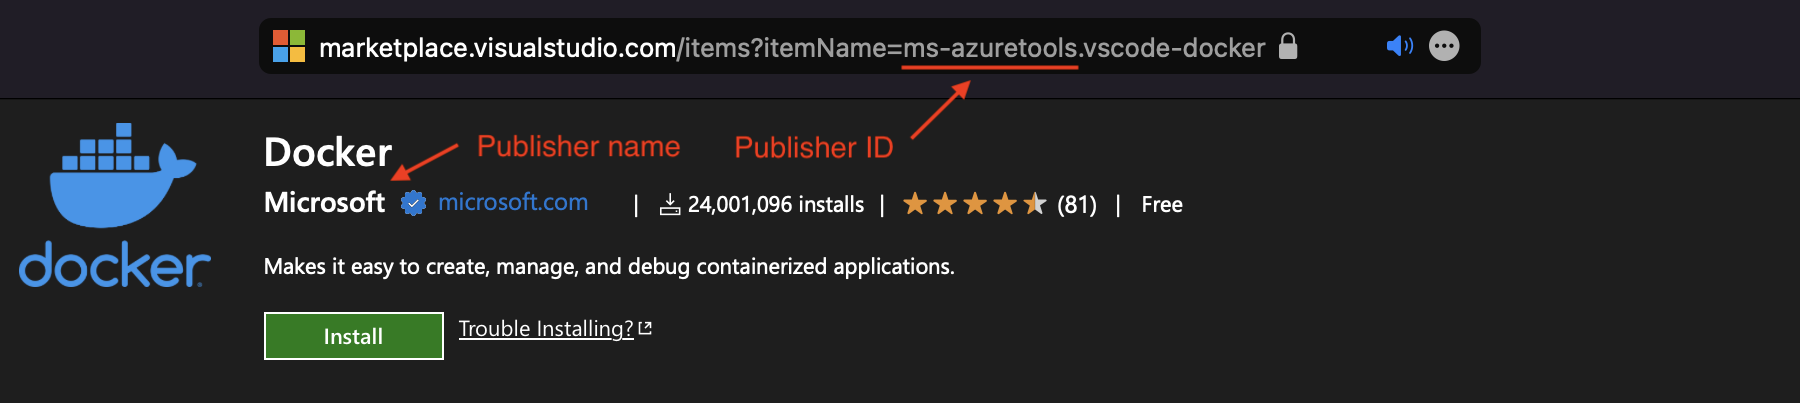
- ID: the unique identifier for your publisher in Marketplace that will be used in your extension URLs. ID cannot be changed once created.
Optionally, fill out the rest of the fields.
(可选)填写其余字段。Click Create 单击创建
Verify the newly created publisher using
vsce. In your terminal, run the following command, and when prompted, type the Personal Access Token created in the previous step:
使用vsce验证新创建的发布服务器。在终端中,运行以下命令,并在出现提示时键入在上一步中创建的个人访问令牌:vsce login <publisher id> https://marketplace.visualstudio.com/manage/publishers/ Personal Access Token for publisher '<publisher id>': **************************************************** The Personal Access Token verification succeeded for the publisher '<publisher id>'.
Once verified, you are ready to publish an extension.
验证后,即可发布扩展。自动发布
首先在package.json填写上刚才登录的publisher name
{
  "publisher": "taylor12138",
}
vsce publish如果发布过程中出现一些报错,不要慌,看看vsce pubish运行的脚本是什么,如果此时用webpack搭建,则
"scripts": {
    "vscode:prepublish": "pnpm run package",
    "compile": "webpack",
    "watch": "webpack --watch",
    "package": "webpack --mode production --devtool hidden-source-map",
    "compile-tests": "tsc -p . --outDir out",
    "watch-tests": "tsc -p . -w --outDir out",
    "pretest": "pnpm run compile-tests && pnpm run compile && pnpm run lint",
    "lint": "eslint src --ext ts",
    "test": "vscode-test"
  },
一些发布的问题
pnpm问题


9.弹窗
showInformationMessage
向用户显示信息消息的弹窗,返回一个promise,第一个参数为弹窗文案,其他参数为弹窗选项
vscode.window.showInformationMessage('0.0 休息一下', '现在就去走一走', '劳资才不要').then((res) => {
  if(res === '劳资才不要') {
    flag = true;
  }
});